How to Install Samsung USB Drivers for Seamless Connectivity

samsung usb drivers

Looking to connect your Samsung device to your computer seamlessly? This article will show you how to install Samsung USB drivers to connect your Samsung device to computer easily.

samsung usb drivers

USB drivers are essential for transferring files, syncing data, and charging your device. Our simple instructions will guide you through installation. We will also offer troubleshooting tips. Our detailed instructions can connect your Samsung device in no time, letting you easily manage and access your files, photographs, and apps.

Why are Samsung USB Drivers important?

Samsung USB drivers play a crucial role in establishing a stable and reliable connection between your Samsung device and your computer. These drivers act as a bridge, allowing your computer to recognize and communicate with your Samsung device effectively.

Whether you want to transfer files, sync data, or simply charge your device, having the correct USB drivers installed is crucial.

samsung connect to pc

Without the proper USB drivers, you may encounter various connectivity issues. Your computer may fail to recognize your Samsung device, making it impossible to transfer files or perform other tasks.

By installing the correct Samsung USB drivers, you can ensure seamless connectivity and unlock the full potential of your Samsung device.

How to download Samsung USB Drivers

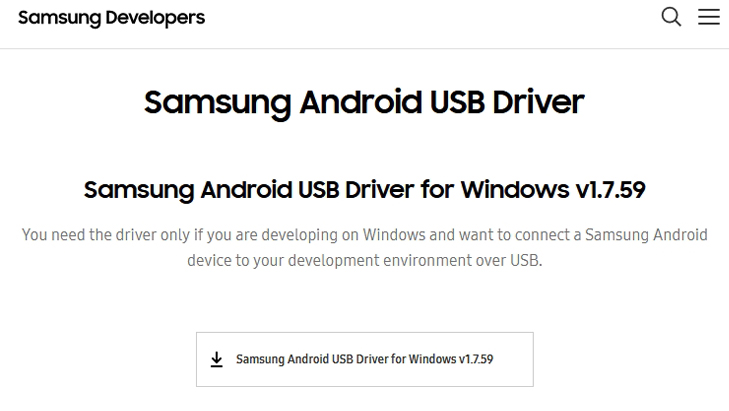
Before we dive into the installation process, let’s first understand how to download the Samsung USB drivers. Samsung provides official USB drivers for their devices on their website. Follow these steps to download the drivers:

  1. Visit the official Samsung website.
  2. Navigate to the Support section.
  3. Enter your device model or search for “USB drivers” in the search bar.
  4. Locate the appropriate drivers for your device and operating system.
  5. Click on the download link to start downloading the drivers.

Ensure that you download the drivers from the official Samsung website to avoid any compatibility or security issues.

Installing Samsung USB Drivers on Windows

Now that you have downloaded the Samsung USB drivers, let’s proceed with the installation process on a Windows computer. Follow these steps:

  1. Locate the downloaded drivers on your computer.
  2. Double-click on the downloaded file to begin the installation.
  3. Follow the on-screen instructions provided by the installation wizard.
  4. Accept the license agreement and select the destination folder for the drivers.
  5. Click on the “Install” button to initiate the installation process.
  6. Wait for the installation to complete.
  7. Once the installation is finished, restart your computer.

Congratulations! You have successfully installed the Samsung USB drivers on your Windows computer. Your Samsung device should now be recognized by your computer, allowing you to establish a seamless connection.

Installing Samsung USB Drivers on Mac

If you are using a Mac computer, the process of installing Samsung USB drivers is slightly different. Follow these steps:

  1. Locate the downloaded drivers on your Mac.
  2. Double-click on the downloaded file to extract the drivers.
  3. Open the extracted folder and locate the installer file.
  4. Double-click on the installer file to begin the installation.
  5. Follow the on-screen instructions provided by the installation wizard.
  6. Accept the license agreement and select the destination folder for the drivers.
  7. Click on the “Install” button to initiate the installation process.
  8. Enter your Mac’s administrator password if prompted.
  9. Wait for the installation to complete.
  10. Once the installation is finished, restart your Mac.

Well done! You have successfully installed the Samsung USB drivers on your Mac. Your Samsung device should now be recognized by your computer, allowing for seamless connectivity.

Troubleshooting common issues with Samsung USB Drivers

Sometimes, despite installing the correct USB drivers, you may still encounter connectivity issues. Here are some common problems and their solutions:

Device not recognized

If your Samsung device is not recognized by your computer, try the following steps:

  • Ensure that you have installed the correct USB drivers for your device and operating system.
  • Disconnect and reconnect the USB cable, ensuring it is properly connected.
  • Try using a different USB port on your computer.
  • Restart both your Samsung device and your computer.

Driver installation error

If you encounter any errors during the installation process, try the following steps:

  • Restart your computer and try reinstalling the drivers.
  • Disable any antivirus or firewall software temporarily, as they may interfere with the installation process.
  • Download the drivers again from the official Samsung website to ensure the file is not corrupted.
  • If you are still experiencing issues, it is recommended that you reach out to Samsung’s customer support for further assistance.

Conclusion and final thoughts

With the step-by-step instructions provided in this guide, you should now be able to install Samsung USB drivers on your Windows or Mac computer effortlessly. These drivers are essential for establishing seamless connectivity between your Samsung device and your computer, allowing you to transfer files, sync data, and perform other tasks without any problems.

Remember to always download the USB drivers from the official Samsung website to ensure compatibility and security. If you encounter any issues during the installation process, refer to the troubleshooting section for solutions.

Say goodbye to frustrating connection problems and get ready to experience seamless connectivity with Samsung USB drivers. By following this guide, you’ll have your Samsung device connected in no time, allowing you to effortlessly manage and access your files, photos, and applications.

Enjoy the convenience and efficiency that come with a stable and reliable connection between your Samsung device and your computer. Install the Samsung USB drivers today and unlock the full potential of your Samsung device!
Simple Steps to Set Up iPhone Visual Voicemail

iphone visual voicemail

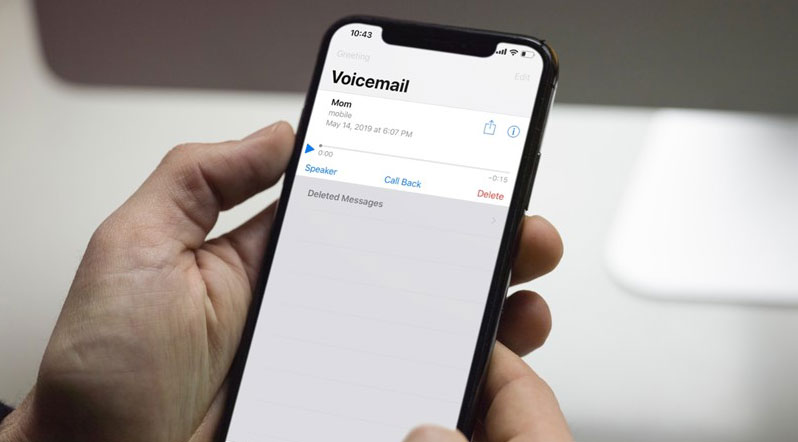
What is iPhone visual voicemail? Do you have a voicemail account on your iPhone? If not, you are missing out! It is an incredible way to save time by listening to your messages in the background while doing whatever you are doing. Here’s how to set up visual voicemail on your iPhone completely, and keep the peace in your cell phone conversations!

iphone visual voicemail

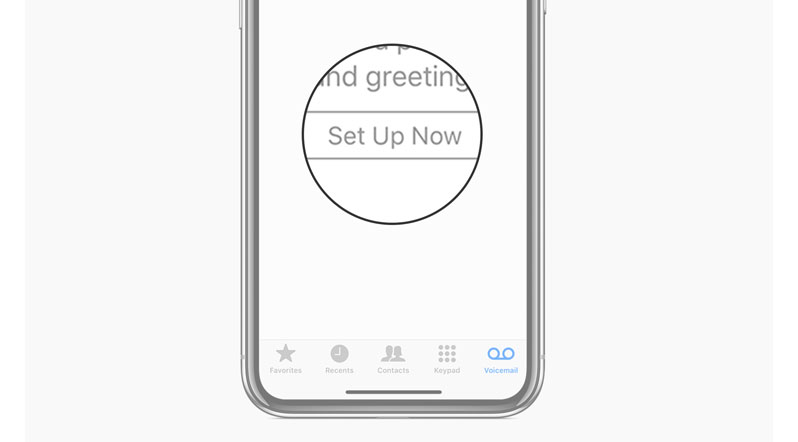
How to Set Up iPhone Visual Voicemail

There are many reasons why you may want to know what is visual voicemail on iPhone. Maybe you are worried that your messages are going to be deleted, or maybe you want to check your messages before they are deleted. If this is you, then you will need to know exactly what is visual voicemail on iPhone.

You will first need to turn off your iPhone. To do this, click the “Settings” icon on your iPhone and scroll to the very bottom. Under the General section, tap “Off“, then tap “Settings.” Now, you will see a countdown timer on the screen, which will tell you that your iPhone has just been turned off. Once the timer reads 100 seconds, your iPhone will be turned back on, and a visual voicemail will begin running again.

set up voicemail on iphone

Now here is how you activate visual voicemail on iPhone. If you have activated it, you will see two buttons: one is a play/pause button, and the other is a mute button. Tap the “Play” button. This will play your voicemail message, and at the same time, the music from your incoming call will be played in the background.

The final step is simple. Tap “Mute” and then touch the switch on the bottom right corner of your iPhone. At this point, your iPhone will go black, and you will be able to see nothing but the switch. At this point, you can close your eyes and listen to your voicemail without having to see any of it.

Listen your voicemail

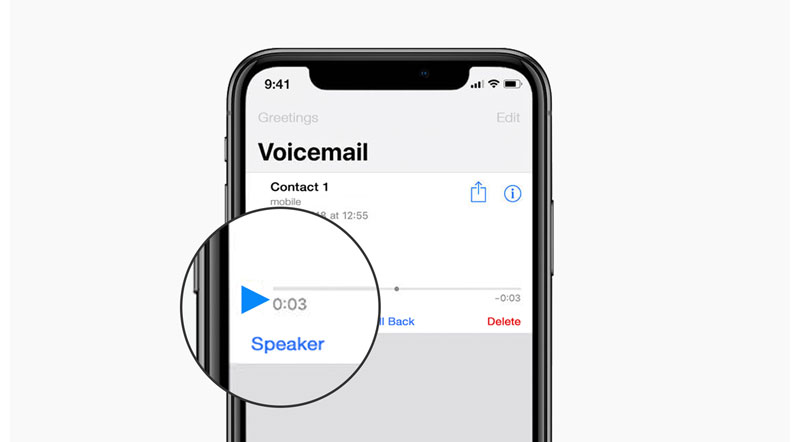
The third step is to listen to your voicemail. To do this, you will need to either hold down the “Play” button or simply tap the” listen to voicemail” label on the left-hand side of your iPhone’s screen. When you tap this label, you will be taken to a screen that displays your latest message. It may display your voice email address, your cellular service provider, your telephone number, your service type, and your greeting. In some cases, you will also be asked to enter a brief description of your message.

listen voicemail message

The fourth and final step is to sign out from your account. This process is usually quite simple – you just touch the “Settings” icon that appears on your iPhone’s lower right-hand corner and then touches “sign out”. With this simple step, you are done with your Auth setup! The fourth step is the most important part of this entire process, however – once you have signed out, your iPhone will not make any more outgoing messages to your cellular service provider until you enter your unique voicemail password.

How to Reset Laptop to Factory Settings Easily and Quickly

reset laptop to factory settings

Did you find your laptop is not running well? So, it may be your laptop has some problems, especially in the setting of the Windows. When this trouble comes to you, then you need to reset the Windows on your laptop. Well, here are some guides to reset laptop to factory settings in both Windows 7 and 10.

reset laptop to factory settings

The steps to reset laptop to factory settings

When your laptop are working slowly, then one thing you must to do is speeding up the Windows. But, if the trouble is not only on the Windows, you have to do a full reset in order to make it clear. Here are the steps how to reset laptop to factory settings for Windows 7 and 10.

  • The steps how to factory reset your laptop for Windows 10

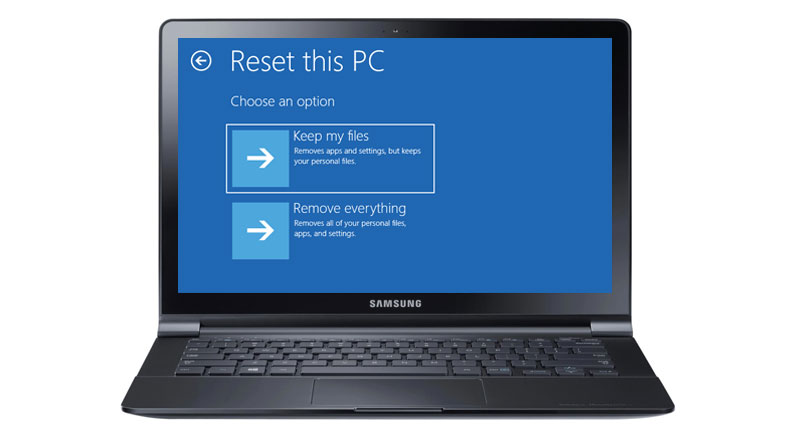
Actually, compare to the other Windows, the processes on the Windows 10 is really easy. The first thing you have to do is open the “Start Menu” and choose the “Settings” menu. After that, please type “reset” in the search bar and then select “Reset this PC” that is located on the left when the result of it appears.

Then, you can start to click “Get Started” to begin the process. The menu is located under the menu of “recovery” of the “Updates & Security”. Through this step, you can choose the option of “keeping the files or doing a full reset”. Finally, the process of the factory reset is finished.

  • The steps to factory your Laptop for Windows 7

Compared to the previous steps, the step how to factory on the Laptop for Windows 7 is simpler. First, you have to start up or do a reboot on your Laptop. After that, you have to click on the appropriate F key during the process of the reboot.

Then, there will be the small windows of opportunity to strike the key. So, you do not need to worry if it takes the process a few attempts. After that, you just need to follow the instructions that appear on your screen and it will confirm the process. Then, just wait for 30 minutes until the process is done.

Both of the ways how to reset laptop to factory settings are the best. You just can do it in simplest steps.

How to Factory Reset iPhone 13 Without Password in a Simple Ways

factory reset iphone 13

It is essential for you to know how to factory reset iPhone 13 without password when you need to it. You will need to do it for several reasons. Probably you will need to do it because there is a severe problem. Some tough problem on iPhone solution is through a factory reset. To avoid serious mistakes when you do so, you should read the iPhone 13 user guide for beginners.

To do this factory reset, you should be aware of few things. One of the important things, before you do it, is to make sure that you already backed up your data. Preferably you back it up via iTunes. You can do it even whether you already set the password or not. So, if you already set the password but forgot it, you can still make this.

factory reset iphone 13

Below is the information for you to do the factory reset. But please note that this procedure is for those who already back up the data through the iTunes.

steps to factory reset iPhone 13 without password

If you haven’t back up your data, you should do it first from the Backup menu. You will find the Backup menu on the Settings menu. If you have done with it, you can move to the critical step of doing a factory reset.

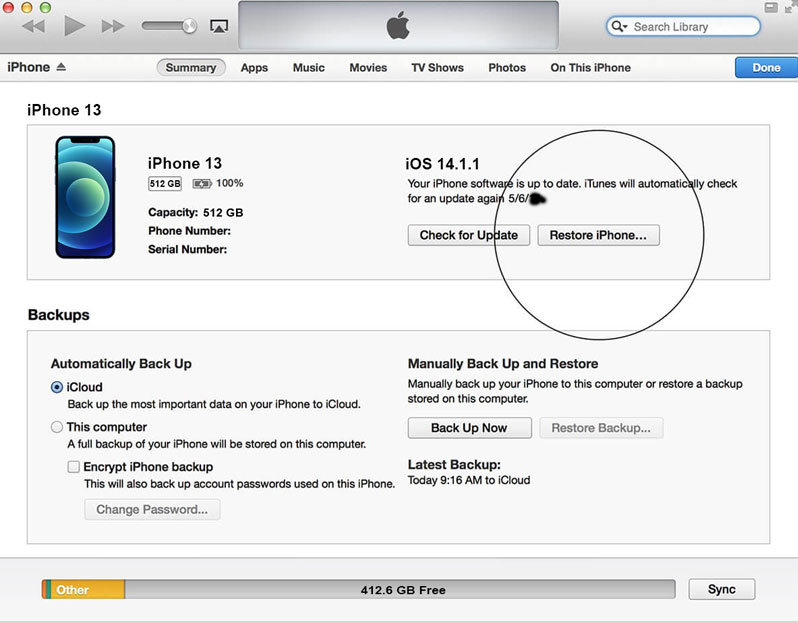
The first step to answering the question how to factory reset iPhone 13 without password with iTunes is connecting it. To do it, connect your device to the computer that you use to sync it. After that, open your iTunes. If it asks you to use the passcode, you have two choices to resolve it. The first choice is to use another computer that you use to sync too. The second option is to use the recovery mode.

restore iphone 13 from itunes

After that, wait for the iTunes until it successfully makes a backup plan for you. If you see the dialogue that said it’s already finished, click the menu Restore [name device]. If your device’s name is iPhone 13, it will appear as Restore iPhone 13.

Once you reach the Set Up screen menu while you do this, tap the menu Restore from iTunes Backup. After that, select your iTunes device and review the date that appears there. Pick the most relevant time and size of the iPhone.

Information

And you are done with it. Please remember that by doing this factory reset, you will also lose your password. Not only the password but also the data inside the device is as a whole. It is why there is a backup point on this explanation of how to factory reset iPhone 13 without a password.

Reset Router Password: The Different Methods to Try

reset router password

Have you ever forget about your router password? It is possible for you if you forget it. To reset your router password, you are allowed to reset it to the factory default setting, then you have to know that reset your router password can be done by 2 kinds of methods. One of them is the ways of how to reset router password netgear.

reset router password

How to reset router password using netgear

The first method that you can apply to reset your router password is by using Netgear. There are 4 instructions that you have to do in this method. What are they? Here are the instructions.

  1. Turn on the Netgear

The first instruction is turning on the Netgear. You can do it by pressing the Power button on it. The router will reboot, so wait for it for one minute.

  1. Locate the Restore Factory Settings

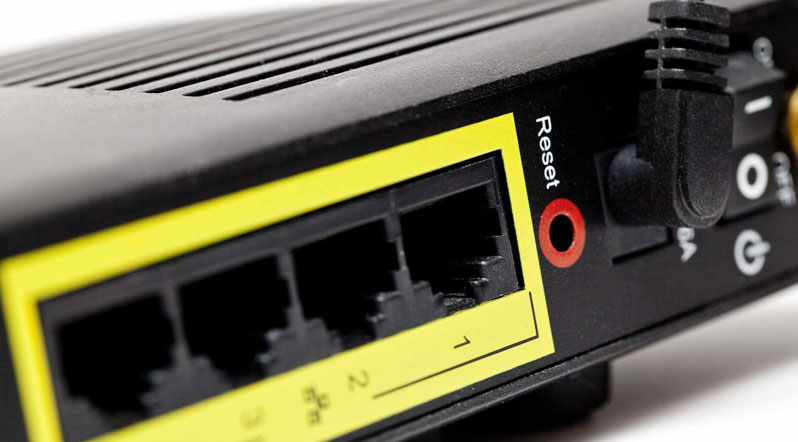
Then, the second instruction is locating the button of Restore Factory Settings on the router. Actually, it is located enclosed in a red circle and labeled.

  1. Press the Restore Factory Settings

After that, what can you do then? Yea, you are suggested to press and hold the button of Restore Factory Settings. Please do it for about seven seconds! To press it, you are allowed to use a small and thin object like the end of a pen or a paperclip.

  1. Release the button

What does it mean? This last step requires you to release the button when the Power light starts blinking. So, you may let the router to restart entirely. In this step, you need to know that the router password will be reset when the light of Power stops blinking. Besides, it will also turn into solid green or white. Therefore, the new default router password is the password.

The tips to resetting your password using Linksys

Then, what about this second method? It will provide 4 main tips that you have to apply. To know it more, please give your best attention!

  1. Locate the Reset button

You can locate the button of reset on the Linksys router. Where can you find that button? Actually, it is such a small and circular button. It can be found on the back of the router and labeled in red ink.

  1. Verify the router

It means that you have to verify that the router is powered on. So, you can press and hold the reset button for 10 seconds.

  1. Disconnect the router

Here, you need to disconnect and even reconnect the router to the power source. You may do it after the completing reset.

  1. Wait for the Power LED 

In this last tricks, it is suggested for you to wait for the Power LED to remain in the solid-state. Commonly, it will need about one minute after you have reconnected the router.

By learning both methods to reset your router password, hopefully, you can apply it well. Just choose one method!

How to Take Screenshot on Pixel Phone Using Simple Steps

take screenshot on pixel phone

To fulfill the absolute need, sometimes you must need a screenshot from the screen of your phone. It is needed because you must need the picture of the screen which is running and you want to get the perfectly similar picture with what is on the screen. Thus, to take a screenshot is the best way to do. If you’re Google Pixel user, below is a guide to take screenshot on Pixel Phone.

take screenshot on pixel phone

Some steps to take screenshot on Pixel Phone

To take a screenshot on Pixel Phone, there are four simple steps that you can do using your Pixel Phone. Do you want to know the steps? Here are the steps to take a screenshot using the Pixel Phone:

  • Open the screen you want to capture

Firstly, before you decide to take a screenshot, make sure that you are on the screen you want. So, make sure that you open the screen you want to capture. After you go to the screen decided, then follow the next step.

  • Press and hold the Power and Volume Down Buttons at the same time for a few seconds.

After you decide the screen you want to capture, the next step you should do is to press and hold the Power and Volume Down Buttons. It is simple to do, isn’t it? And also, your pixel phone will save the screen as an image.

  • At the top of the screen, you’ll see the screenshot capture

When the picture is captured, there will be a notification that your screenshot is captured. When the capture is successful, you can access the image captured after that.

  • The captured screenshots are saved in the Picture>Screenshot folder on your Pixel.

When your picture is saved, you must need to access it. So, when you need to check it, you can go to the screenshot folder in the picture folder. In there, you can find every picture you capture.

Considering that it is important to have a picture of the screen you need, to take a screenshot of it is necessary to do. With this Pixel Phone, you can do it easily and quickly. So, choose this phone to fulfill many needs of yours, includes having a screenshot easily.